
Cleaning a vape coil or changing one out is crucial maintenance on any form of vaporizer. It can be quite dangerous to continue using a vape pen kit without performing any type of maintenance. You could be sacrificing flavor, risking coils and even getting your battery to the point where it may shut down regularly. Rather than replacing a device more consistently, you may want to opt for buying a better quality vapor that allows for coil replacement, mods and other features that can help you enjoy a better quality of vapor and more longevity from your device. Starter kits and pen vapes are a great idea for beginners but if you are serious about vaping, it can be far more economical to spend a bit more on a device with replaceable components and components that can be cleaned. Be sure to follow these steps so that you can enjoy a better vaping experience in the future and more confidence in cleaning your vape.
What is a Vape Coil?
Vape coils are some of the most crucial components of any vaporizer as they are responsible for heating up the E-liquid that will eventually turn into vapor throughout the device. Because of the number of individuals that commonly referred to atomizers as heating coils or vape coils, this name works as a synonym.
The atomizer sits at the heart of your vaporizer device and it's one of the fundamental pieces that's responsible for delivering a good quality vapor. The coil and the quality of components on board will be responsible for the type of vapor that you receive. The vape coils contain far more than just metal components that can be heated up too.
Most vape coils contain items like a wicking material, contact leads that can heat up easily and more. Throughout this article we will and why regular maintenance on items like your vape coil is so crucial.
Why you should Know How to Clean a Vape Coil?
When you're getting to know a brand-new vaporizer it's important to know how you can properly clean the vape coil too. Your device is going to perform admirably from the moment that it comes out of the box but it doesn't take long for a vape coil to start picking up gunk and debris as you continue to use it. If you've used more than one vaporizer in the past and you know the difference between a clean vaporizer and one that has been put to extreme use, you can start to see the major differences in vapor quality.
As a beginner with a vaporizer you might find yourself a bit intimidated on device maintenance tasks. When it comes right down to it, familiarizing yourself with the device can give you a better quality and cleaner vapor from every hit as well as a safer experience with your vaporizer.
The components of a Vape Pen Starter Kit
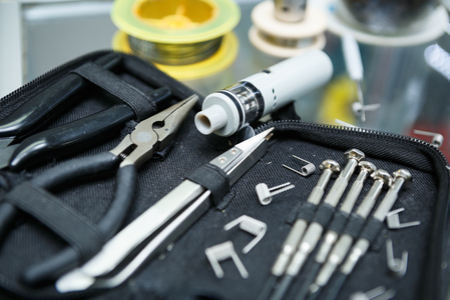
In order to properly understand how to clean a vaporizer it's very important that you also understand the basic components of a vape pen starter kit. Most typical vaporizers are made up of the same components and by familiarizing yourself with this construction, you can work at discovering exactly where the coil components will be on your vaporizer. Vaporizers contain:
- A tank: the tank component is responsible for holding the E-liquid and typically tanks will have internal vape coils on board. Combining the E-liquid and vaporizer together ensures that there is less chance for a coil burnout or difficulties in setting up the device.
- Vape coil: devices will contain the vapor coil which is the heating element we've been discussing. This coil is responsible for converting the E-liquid that you place into the device into the vapor that you inhale from the device.
- The battery or power source: motivates contain a battery that varies with its complexity. Some batteries will have advanced temperature control options whereas others will have a set control available that goes directly into the coil. Simpler style vaporizers will just have a set battery with minimal controls available on the device.
- Box mod: this is an additional item that has been common in a series of devices today. It's considered to be a larger housing that can have more powerful batteries. Mods are not generally used by people that are new to vaping but they can help you to customize your experience and enhance the flavor of vaping too.
When should you Clean out your Device?
Cleaning or rinsing out your tank is something that you'll definitely want to do every time you're changing out in E-liquid. If you're going to be changing flavors, there's nothing worse than a mixture of some of the previous flavors intermingling with a new e-juice. If your device is giving you difficulty you might want to consider a full-scale cleaning or change out of your atomizer for better results.
Cleaning your Tank While Cleaning your Coil
It's usually recommended to clean out your tank component when you are going to be performing maintenance on the coil or any other component of your vaporizer. It's a good idea to clean out the tank every time you change up E-liquids and to make sure that you don't spill any E-liquids during the process of your maintenance. A quick rinse out of the vapor tank is usually standard practice during these times, the following is how you should proceed.
How to Clean Vape Tank?
- Fill up a bowl with warm water
- Detach your vapor tank from the mod and mouthpiece
- Dispose of extra E-liquid that could be in the tank
- Disassemble your tank completely
- Place all tank components into the bowl
- Wash your tank components in the water until they're completely clean, if the tank is dirty place a few drops of dish soap into the water.
- Dry off each component with a paper towel.
- Let the components air dry for 10 to 15 min.
- Reassemble the tank and the device.
Deep Cleaning the Tank
Occasionally it can be wise to do a much more thorough cleaning of the tank. If you've been using your tank regularly with plenty of different E-liquids, it might be a good time to perform a deeper clean to remove more of the residue from the tank. E-liquid can sometimes collect over time and gunk up the inside of the tank which can cause difficulties with the device later on. Here are the easiest actions for deep cleaning the tank:
- Detach your tank from the mod and dispose of the extra E-liquid that in the tank.
- Disassemble your tank completely
- Put high proof alcohol into a container and wash around inside the tank. A non-flavored vodka or medical grade alcohol works best for breaking down deposits of E juice that can be found throughout the tank. Take a damp cloth and scrubby into any areas where deposits have collected across the tank.
- Rinse the entire tank down with warm water
- Let all the components stand for 10 to 15 min. as they air dry
- Reassemble the device and the tank when it is completely dried out
How to Clean a Vape Coil?
Even if you're regularly cleaning out your device and the tank, your coils will eventually need changing as well. Replacement for your coils or a cleaning is essential to maintaining your vaporizer. When a coil is used improperly or it gets covered in materials it can burnout. This can cause your it device to stop working or even cause a massive burnt flavor on every drawer in the device. A coil will have a huge impact on the flavor of the vapor that you can get out of the device. A quick inspection of your coil is usually a good idea before you are going to be cleaning or replacing the coil.
Signs your coil will need changing or repair:
- A coil that is dark, damaged or crusted on
- Consistent burnt taste out of your device
- Leakage on your device around the coil
- A massive decrease in flavor and vapor production
The process of cleaning your coil can be done as you clean out the tank. If you have a tank that you've cleaned out with our previous instructions, it's likely that you've also clean the coil on board as well. If you have a separate atomizer or coil with your device, you could consider using a wet cloth with some alcohol or water around the coil gently. Compromising the wick during your cleaning could cause the coil the burnout faster. Changing the coil is often one of the best courses of action if you are experiencing a major impact on flavor with the device.
Changing the coil
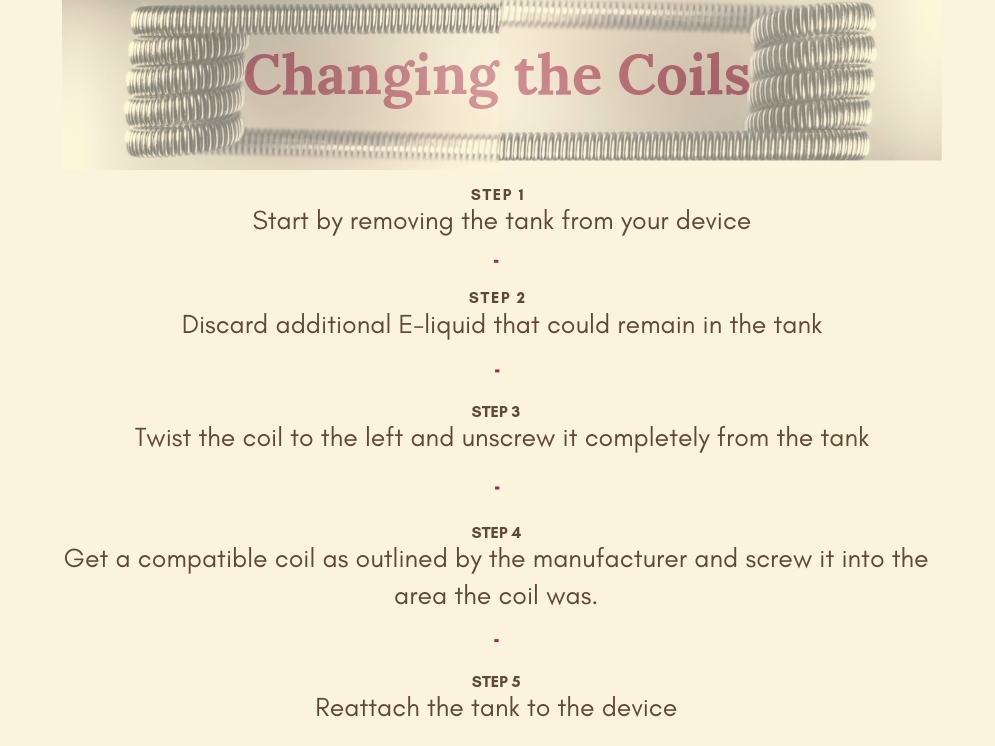
Be sure to prime the new coil before use. You can find instructions on how to properly prime a vape coil in some of our other posts.
Tips for Maintaining your Vape
If you are going to be using a vaporizer regularly you will need to know exactly how to replace the coil on that device when the time comes. The good news is that you can find a manufacturer that delivers a compatible coil for that device quite easily. Many of the top vapor manufacturers include instructions on how to clean your vaporizer. Some of the most important instructions that you can follow in maintaining your vaporizer are some of these:
- E-liquid levels: Do not let your easily it could tank run dry and make sure that there's always enough E-liquid in the tank as you are operating the device. Adding E-liquid and making sure that the tank is never filled to the top is crucial to preventing coil burnout and maximizing flavor. Most manufacturers will outline the total amount of vape juice that should be present in their device for optimal use.
- Store your vaporizer in the proper environment: exposing E-liquid to extreme heat or leaving your device out in direct sunlight can sometimes break down the seals or even affect the electronics on board. Storing your vaporizer in a proper place like a storage case is important and the same goes for the E-liquid that you're going to be using.
- Prime your coils accordingly: when performing any type of maintenance or keeping your coils dry for some time, it's important to re-prime the coils before you activate the device. A failure to prime your coils could lead to breakage within your device that could impact vapor quality and cause you to go through coils quickly.
- Replace the battery when needed: if you've been running the same battery in your vaporizer for several years, there's a good chance that it's lost efficiency. If you can find a replaceable battery you may be able to enjoy a more flexible experience and less worry about your battery running out. Replacing the battery on board your vaporizer regularly will make sure you have access to the best power levels on your device. Always be sure to use a manufacturer compatible battery for your device.
Conclusion
Now that you knew more about cleaning and maintenance with your vaporizer, you can feel more confident in the process of maintaining your favorite vape device. Understanding how to change a vape coil or clean out a vape tank can make sure that the devices you are using currently can be enjoyed for many years in the future. By following this guide and working to clean your device properly you can make sure that you can experience the best level of vapor quality from your device.
Photo sources: pixabay.com, shutterstock.com, pexels.com, flickr.com, gettyimages.com, istockphoto.com, unsplash.com, freeimages.com, 500px.com, rgbstock.com